Creating a custom trader npc in Minecraft
My spouse wanted me to write down what I learned for creating custom shop NPCs in Minecraft so she could learn how as well, so I thought I’d do a blog post so that I could add screenshots and such. My kid wanted to make a custom minecraft map where you could trade items with NPCs to get equipment, and after finding a couple videos on the topic and browsing the Minecraft wiki, this is what I’ve come up with.
Note that all of these instructions are for use with Minecraft Bedrock Edition. Java edition may have slightly different ways to create the commands to do this.
Additionally, this all assumes you are in operator mode on the world you’re doing this in. You won’t be able to do this in a survival world where cheats are not enabled, or where you cannot change your role to operator.
We’ll create a store that takes 3 emeralds and gives the shopper a diamond sword in exchange.
Setup
Once you’ve built the place you want your shop NPC to stand, stand in that spot yourself and run the following command:
/summon npc
This will create the NPC you will use as your trader. You can right click on them to configure how they look, change what their nameplate says, and write what dialog they’ll say when right clicked on by a player:
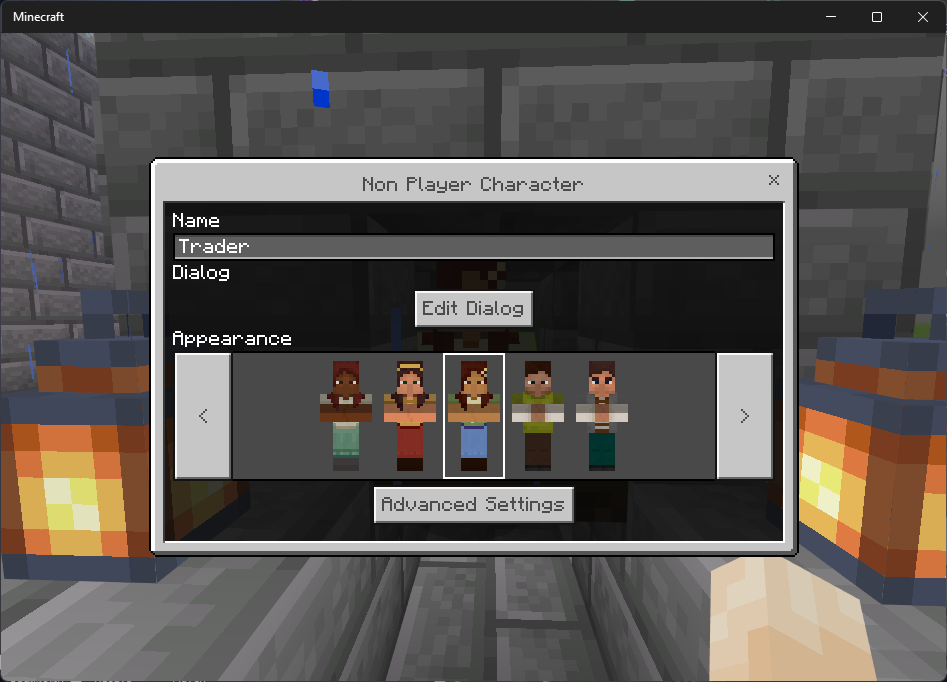
Configure all these things as desired. It may be useful to provide a list of prices for items your npc is offering for trade in its dialog box.
Next, give yourself the needed command blocks with these commands:
/give @s command_block
/give @s chain_command_block
If you’re not in creative mode, you may want to give yourself a stack of them by adding a space and the amount you want (perhaps 64) to the end of the command. This will give you an orange “impulse” command block and a teal “chain” command block you can use
Place an orange command block down so that there’s one block of air behind it, opposite of the direction the block is pointing.
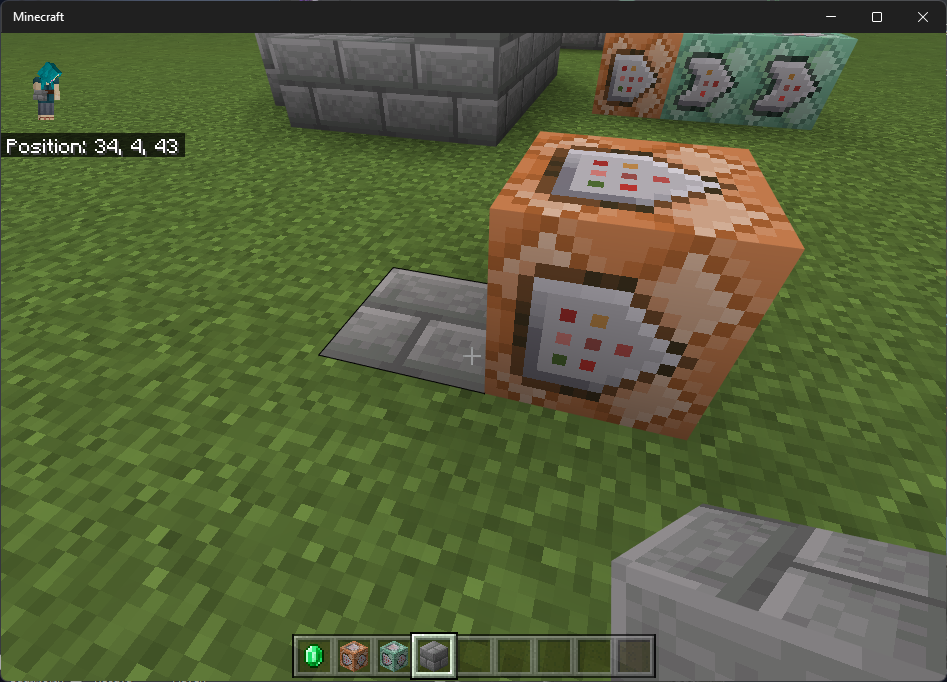
The stone bricks show where the air will need to be.
Stand in this location, and note its position. For my world’s store, it’s x=33, y=4, z=35
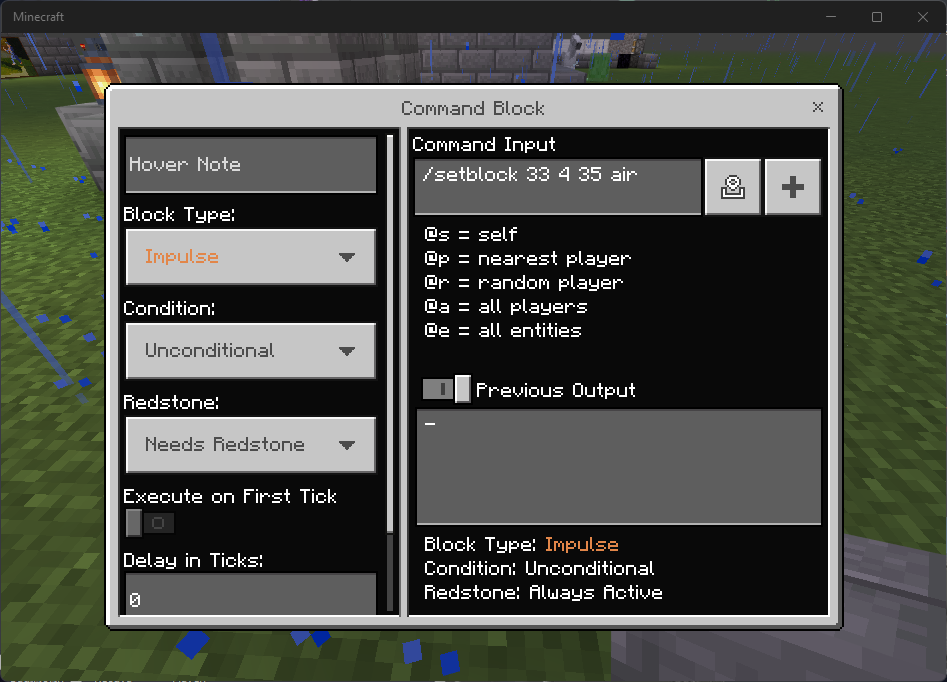
Right click the command block, and enter the following command into the “command input” section:
/setblock 33 4 35 air
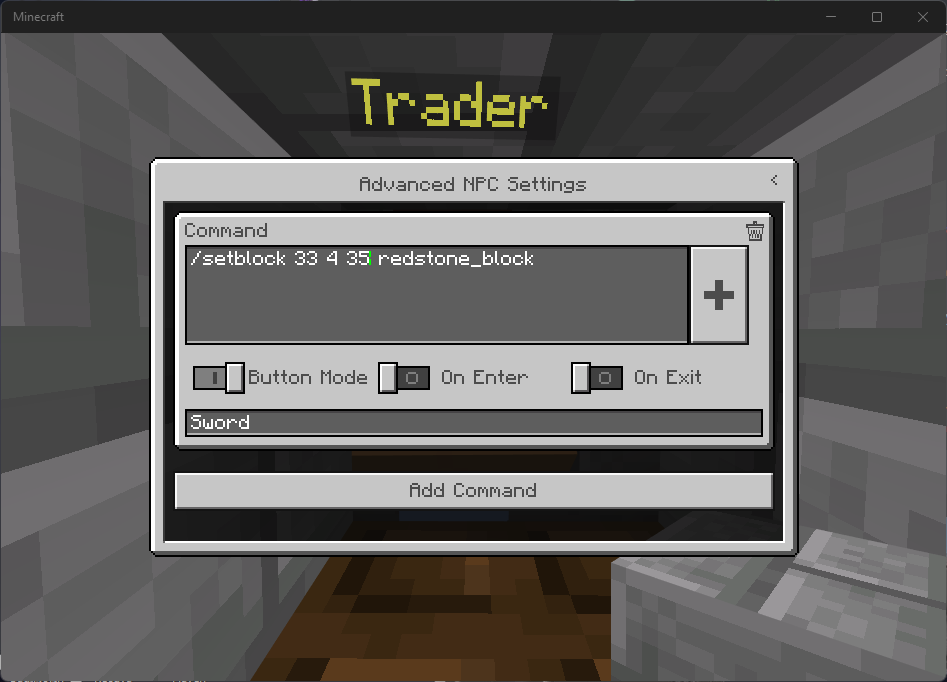
Now, go back to your NPC, and right click. Click on Advanced Settings. This is where you’ll create buttons in the dialog box to let players choose to buy something.
If all you see is Add Command, click that to create the command that will run to trigger the purchase. Enable “Button Mode”, and below that write the text you want to appear on the dialog choice (in my case, it’s “Sword”). Then, in the “Command” text box, enter this command:
/setblock 33 4 35 redstone_block
(changing 33 4 and 35 to the x, y, and z coordinates that are behind your command block.)
Now, when you talk to the npc (when an operator, when you go into the dialog editor), you’ll see your button. If you test this button, it will add a redstone block behind your command block, triggering it, and the block that’s there will trigger the next blocks we’ll be adding, and remove that redstone block to let the command blocks be activated again.
The Payment
Now we get to the most complex parts of the commands we’ll be running. Place two teal chain command blocks down in front of the orange one you created, so that they’re all pointing in a line, one after the other like so:

Next, right click the first chain block in the line, that the orange one is pointing to. Change its “Condition” value to Conditional, which makes it run if the prior command block’s command succeeded. Change it’s “Redstone” value to Always Active so that it doesn’t need to be powered to run its command.
Then, type this command (as one line, broken up on multiple lines here for readability) into the command block’s box:
/clear
  @p[r=2,x=30,y=4,z=35,
     hasitem={item=emerald,quantity=3..}]
  emerald 0 3
It should look roughly like this (if you need to see the entire command, click the + button):
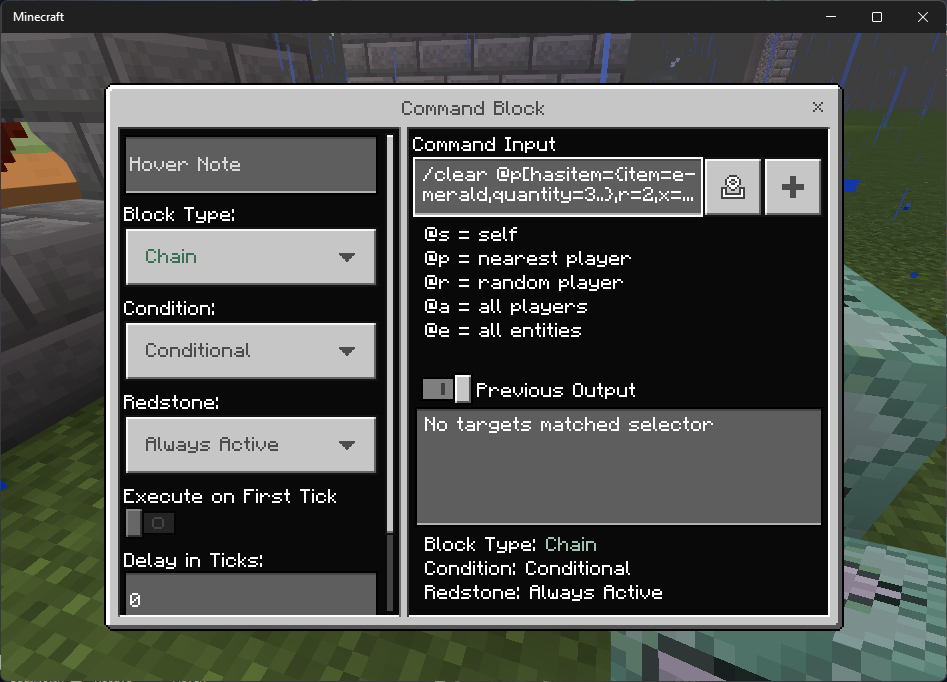
This command looks complex, so i’ll explain. You’ll need to change it slightly for your specific case:
/clearwill clear items from the target’s inventory. With no options, it removes everything from your inventory, which is handy in creative mode.emerald 0 3at the end of this command will remove specifically only emeralds, and the3specifies how many to remove. The0specifies item variants (like wool color), but is0for items that don’t have variants.@p[...]lets you choose the nearest player to whatever is running the command. We pass some arguments in the[]to better control who we’re looking for.x,y, andzspecify where to start searching for the nearest player. My example places the player where I expect they’ll be standing when talking to the npc, Change this to the coordinates you need.rspecifies the search radius from the given coordinates, in blocks, if you want to add some margin for error. Optionally change this if you need or want to.hasitem={item=emerald,quantity=3..}finds the nearest player with an item we specify.item=emeraldmeans we’re looking for players with emeralds in their inventory.quantity=3..specifies they need at least 3 emeralds (signified with the..after the number). Without the.., you could only trade if you had exactly 3 emeralds.
Thanks to the hasitem filter, if the player has the needed amount of emeralds, the command will remove them from their inventory and trigger the next chain command block. If they don’t have the needed amount, nothing will happen!
The Product
Now, right click the final chain command block. Configure it like the first, with Conditional condition, and Always Active Redstone options.
Enter the following command in this command block:
/give @p[r=2,x=30,y=4,z=35] diamond_sword 1
This command is much simpler, as we only need to specify the location and radius to search for the player in the @p selector. Change the coordinates and radius to be the same as what you entered in the prior command block to what you need for your own world.
Remember that this block will only execute if the prior one succeeded, meaning it will only grant the player a swird if they had the necessary amount of money.
Test!
That’s all there is to it; All you need to do now is test to make sure it works!
If you want to add more items that may cost different amounts or kinds of items as payment, you’ll need to add a new row of command blocks in a similar configuration, and have the NPC’s dialog button create a redstone block behind it.
If you want more complex costs for items (like, 3 emeralds and a diamond for a diamond sword), you can add more chain command blocks before the final one that runs /give to test for and clear the right amount of items, just make sure you have enough room in your build to have all the blocks you need in a single line.